IMPORTANT:
Before you attempt to make uniCenta oPOS Configuration changes: You must have MySQL Server 5.7 installed and running correctly.
Watch this video to see how to install MySQL Server
The most essential setting is that you have a MySQL server installed, set up, and running correctly. Without it you cannot run uniCenta oPOS.
As uniCenta oPOS evolves you may find that new options are shown on the Configuration panel tabs and not shown here. Please refer to Release Notes and documents that accompany each release.
If you find your are Configuring for the first time, our advice is to take things step-by-step and try not to feel too intimidated. Follow the steps on this page and you won’t go far wrong.
If you’re upgrading it’s recommended you read the upgrade page.
There are a few things that need to done if this is a new uniCenta oPOS installation. If an upgrade, most previous existing settings will be there – in some cases they are not – so you will need to review and adjust where necessary. Either way it’s a good idea to be prepared before embarking on the set up.
The next important setting is Printers, you will find on the Peripherals tab, and whilst not an essential setting to get you up and running right now it’s worth a bit of effort to save you having to revisit later.
Screenshots may vary from actual screens used in the current uniCenta oPOS version
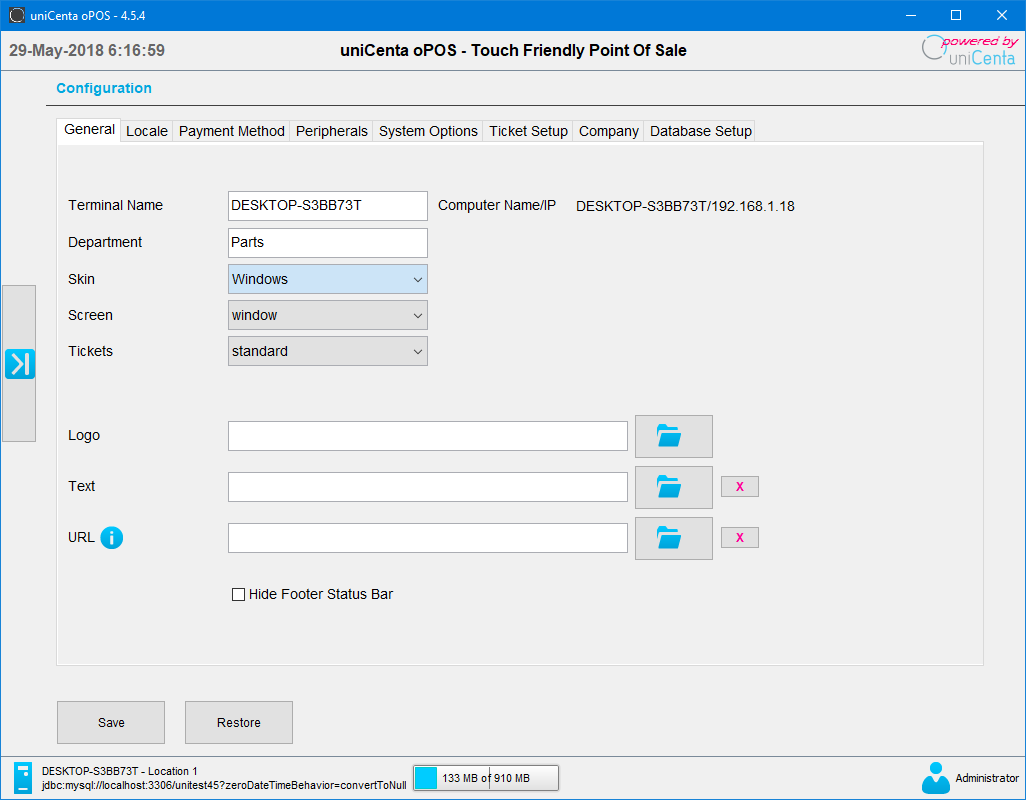 GENERAL
Terminal Name : The Computer Name as set by the Operating System. You change this to one of your preference.
Computer Name/IP : Displays the Computer Name and it’s network IP address. This cannot be changed.
Department : Optional. A description of your choice. Currently not used in this version but intended for future.
Skin : Default – Metal. 33 other Look & Feel’s are available if you prefer. The screenshots on this page are set using the Windows option which on Windows 10 gives the “square” Microsoft Metro effect.
Screen : Default – Window which allows you to run other tasks like email or web browsing. Set to Full screen to lock-out access to other app’s.
Tickets : Default – Standard. Simple allows one sale at a time whereas with Standard you can “stack” (also known as layaway) sales. The Restaurant option has Table Plan and Reservations.
Logo : Replace the uniCenta logo on main login form with your own.
Text : Replace the uniCenta oPOS license text with your own preferred text.
Hide Footer Status Bar : Default – Off. Toggles the footer section on/off. The footer provides useful information especially during the configuration and setup of uniCenta oPOS. When you’re ready you can flip to ON to gain more screen space when in use.
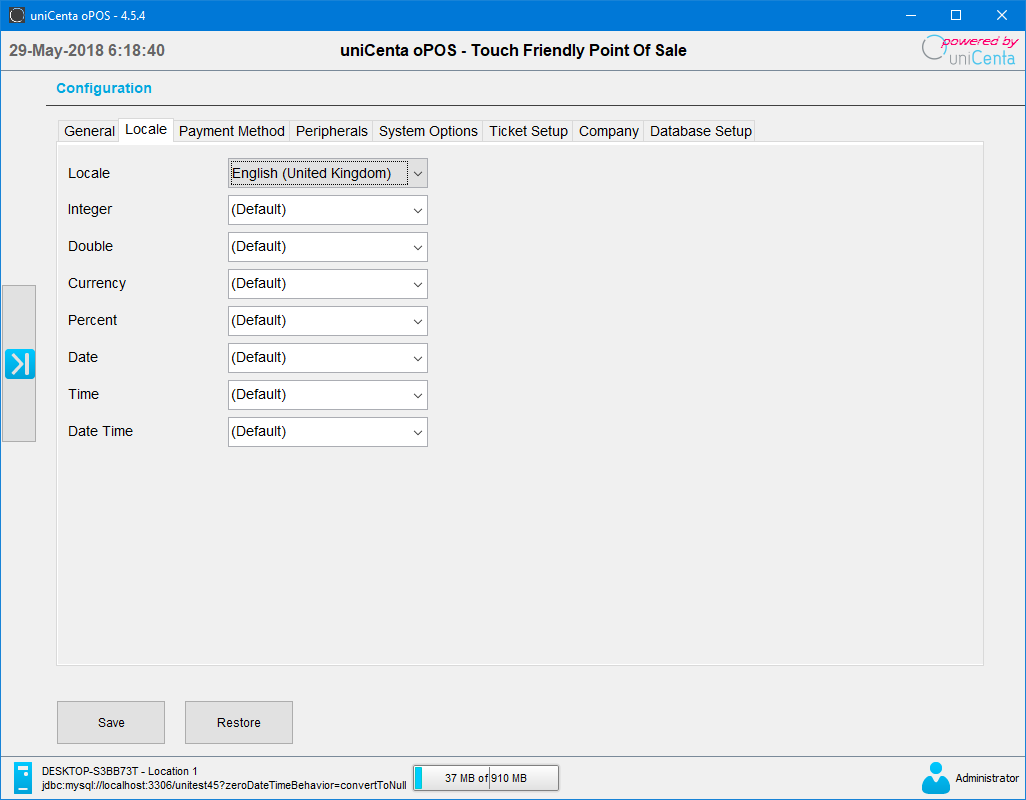 LOCALE
The following settings shouldn’t need to be changed as uniCenta oPOS picks up your computer’s current settings. You can if you need to though.
Locale : Change this if you prefer to operate uniCenta oPOS in another language.
Integer : How you want to see single digits represented.
Double : Need to see three decimal places? Set that here.
Currency : May be you want to change the default currency from a symbol to words – like $ to USD
Percent : Again, it could be you want to see more decimal places.
Date : Change if you have a preference for a certain date style to be used in uniCenta oPOS
Time : Same thing here.
Date Time : And here.
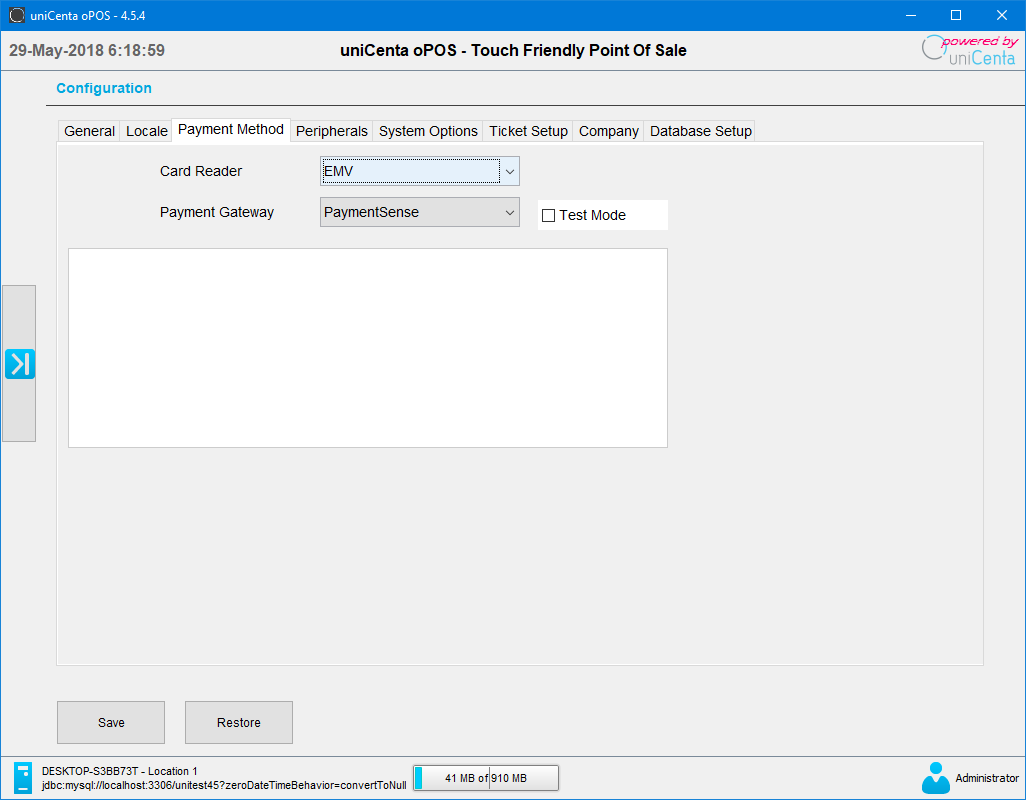 PAYMENT METHOD
Credit Card Payment gateways have been removed from uniCenta oPOS due to the latest PCI Regulations. These will now be available as plug-ins.
Card Reader : Default – Not defined. Used for User and Customer legacy Magnetic Card Readers.
For Credit card terminals used with our posApps plugin manager this needs to be set to EMV
Payment Gateway : Default – Not defined. Use the external option if you currently have a Credit Card terminal and wish to track card sales in uniCenta oPOS.
Alternatively, set to PaymentSense if you are based in UK or Ireland and have a merchant account with them. Or, set to Dejavoo if you are based in USA or Canada and have a Dejavoo merchant account.
Both options use our posApps plugin manager
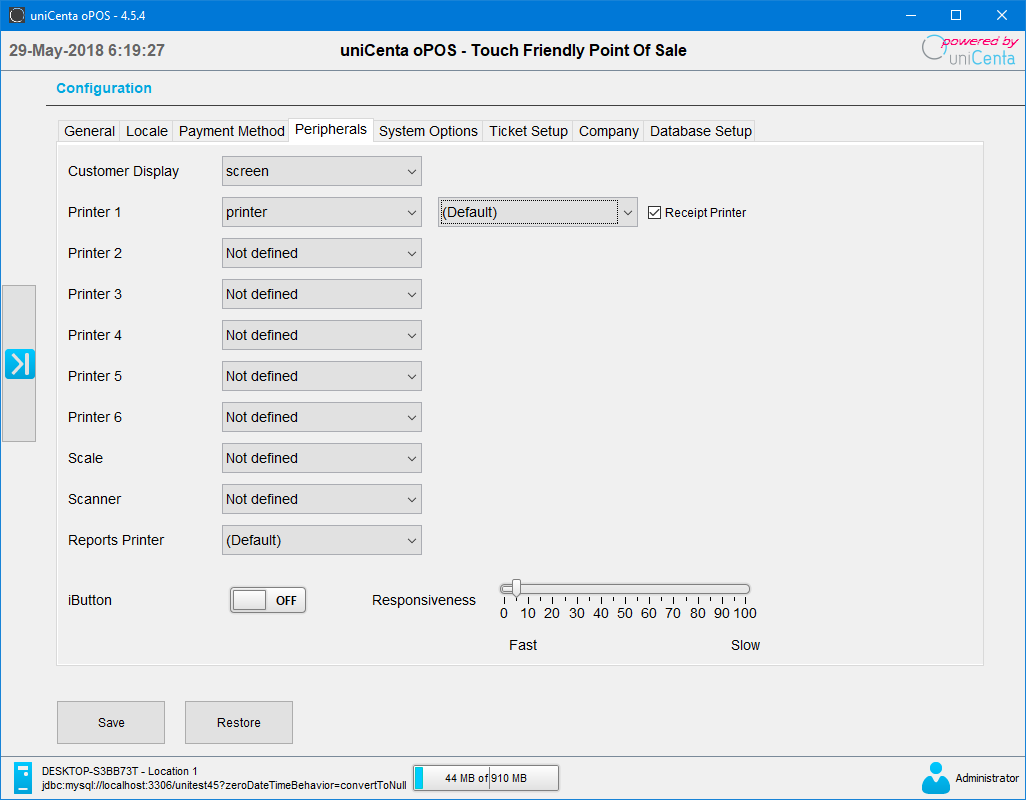
PERIPHERALS
Each of these settings offer a selection for a manufacturer’s communication protocol.
When chosen you will be asked to complete the type and connection port. You can always come back to this section if you don’t have these to hand right now. Set to screen if you don’t so you can check printer output whilst setting up uniCenta oPOS
Customer Display : Applies to both built-in and stand-alone displays.
Printer : This is usually your main receipt printer but you can choose any printer even if it is a remote network printer.
Printers 2 – 6 : Same applies as the the main Printer though any of these may be either directly attached or on a network.
Scale : Choose from one of the manufacturers in the list. Optionally you can choose to display to a virtual scale to screen.
Scanner : Many barcode scanners today are USB and act like a keyboard. If you have serial scanner, set the port it’s connected to. Only Scanpal and compatibles are supported.
Reports Printer : A locally attached or network printer.
iButton : Also known as a Dallas Key. Used for user security. Switch to ON if you have a reader installed. The Responsiveness track – default is 5 – sets the delay period for when the key is lifted off the iButton reader.
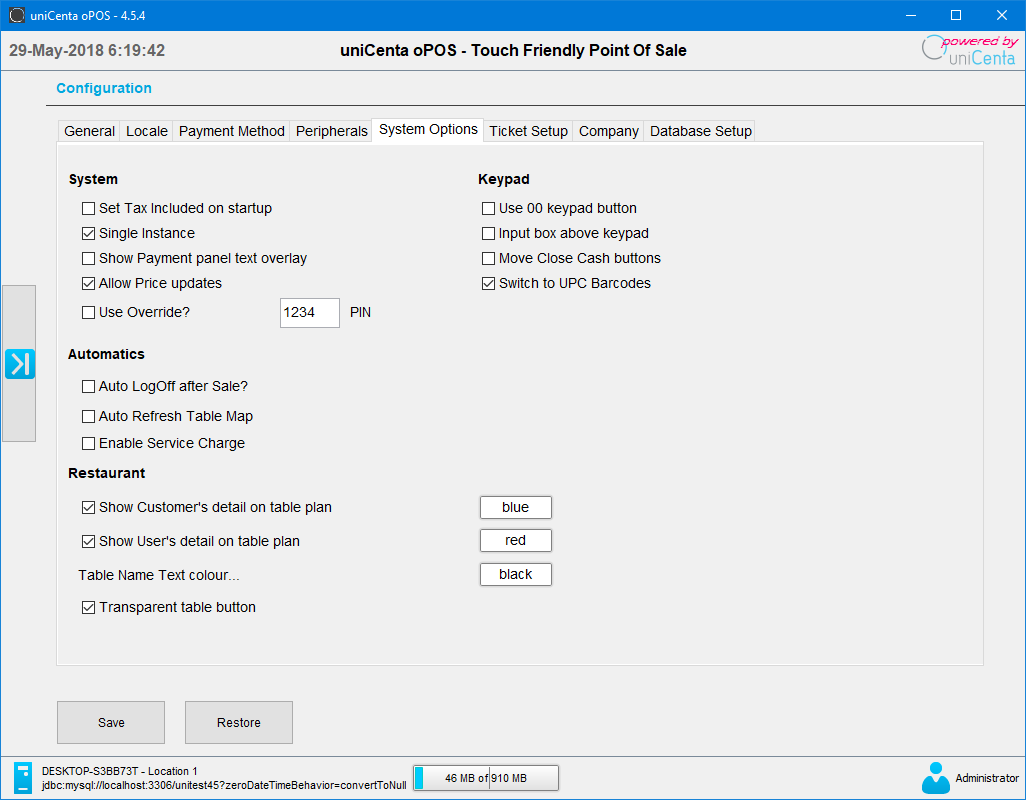 SYSTEM OPTIONS
Settings in this section affect the way certain components appear or function. uniCenta oPOS will work just fine if these are left as they are.
System
Set Tax included on startup : Controls how tax is applied to variable price Products in the sales screen. Leave this un-checked for normal operation.
Single Instance : When checked prevents another copy of uniCenta oPOS running on the same computer.
Hide Payment panel text overlay : Switches off the text shown on the currency images when checked.
Allow Price updates : When checked – allows dynamic update to Product prices when in the sales screen’s Edit Line form.
Use Override? : Check and complete the required PIN to allow a User to override certain functions – like a ticket line delete – where their Role Permission normally disallows it. Generally, used by Administrators and Managers.
Keypad
Use 00 keypad button : Replace the number pad’s single 0 with 00
Input box above keypad : Moves the number pad’s input area.
Move Close Cash buttons : Moves buttons from the form’s footer to the top.
Automatics
Auto LogOff after Sale? : Returns to the login screen after a sale is closed or the sales screen is inactive after After ? seconds
In Restaurant mode – return to table plan? : Check if it is preferred not to return to login screen.
Auto Refresh Table Map : Keeps the table status up to date opposed to doing a manual refresh. After ? seconds
Enable Service Charge :Used together with the special xxx988 Product to add (optional) fixed charge to a sales transaction.
Service Charge Rate ?% : The rate to charge. This value should be net of Tax.
Restaurant mode only? : Will only be applied when Restaurant screen is used.
Restaurant
Note: Right click to show a colour picker popup or enter a hex value e.g. #FFFFFF
Show Customer name on table plan : Check to show when a Customer is assigned to a ticket. Assign a colour using the colour picker.
Show User’s detail on table plan : Check to show the Server’s name assigned to a ticket. Assign a colour using the colour picker.
Table Name Text colour : Assign a colour using the colour picker.
Transparent table button : When checked a table’s button becomes transparent in the Table Management plan.
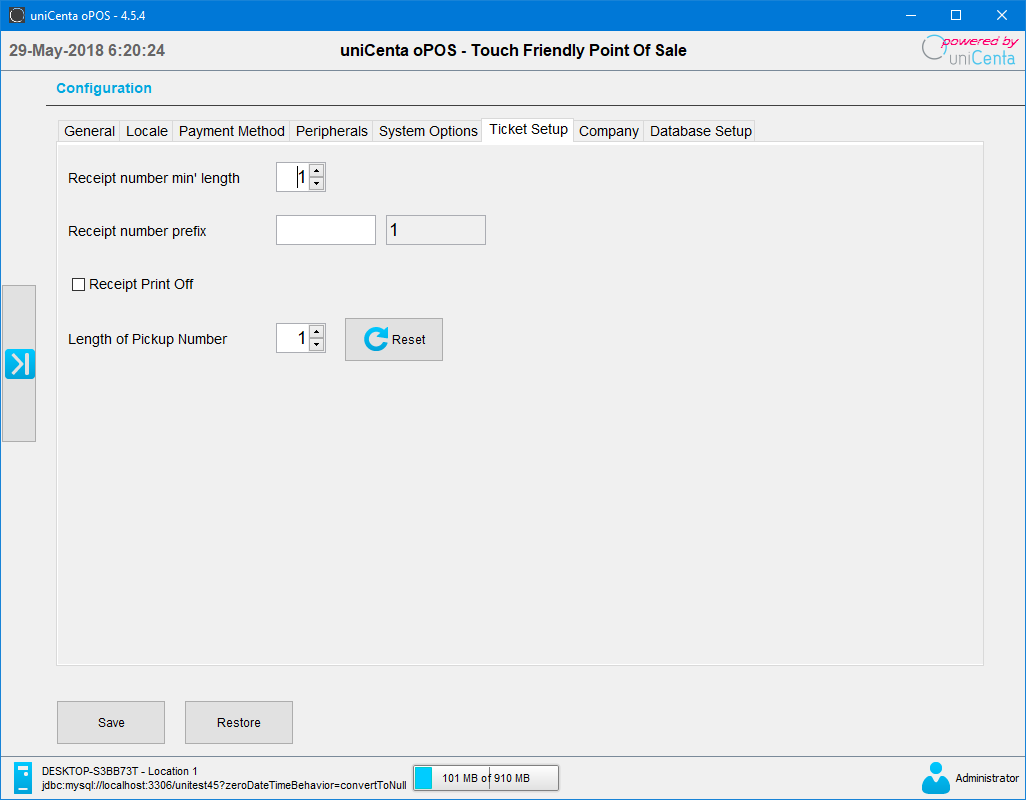 TICKET SETUP
Receipt number min’ length : Determines the printed format of the receipt number. Example if set to 6 would be 000022
Receipt number prefix : Allows you to add further identifier to receipt numbers.
Length of Pickup Number : Unique identifier used when for example sending an order to a kitchen printer.
Receipt Print Off : Controls default receipt print behaviour on the sales close payment screen.
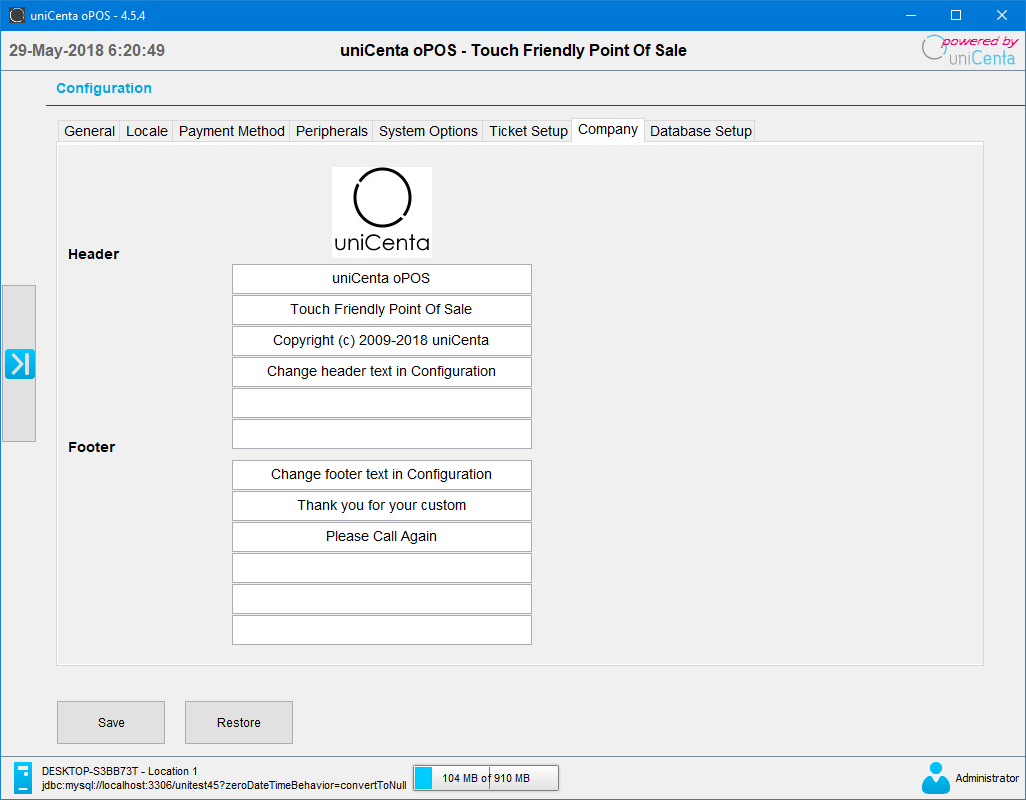 COMPANY
Header 1 – 6 : Complete the text to be used in your receipt’s header section.
Footer 1 – 6 : Complete the text to be used in your receipt’s footer section.
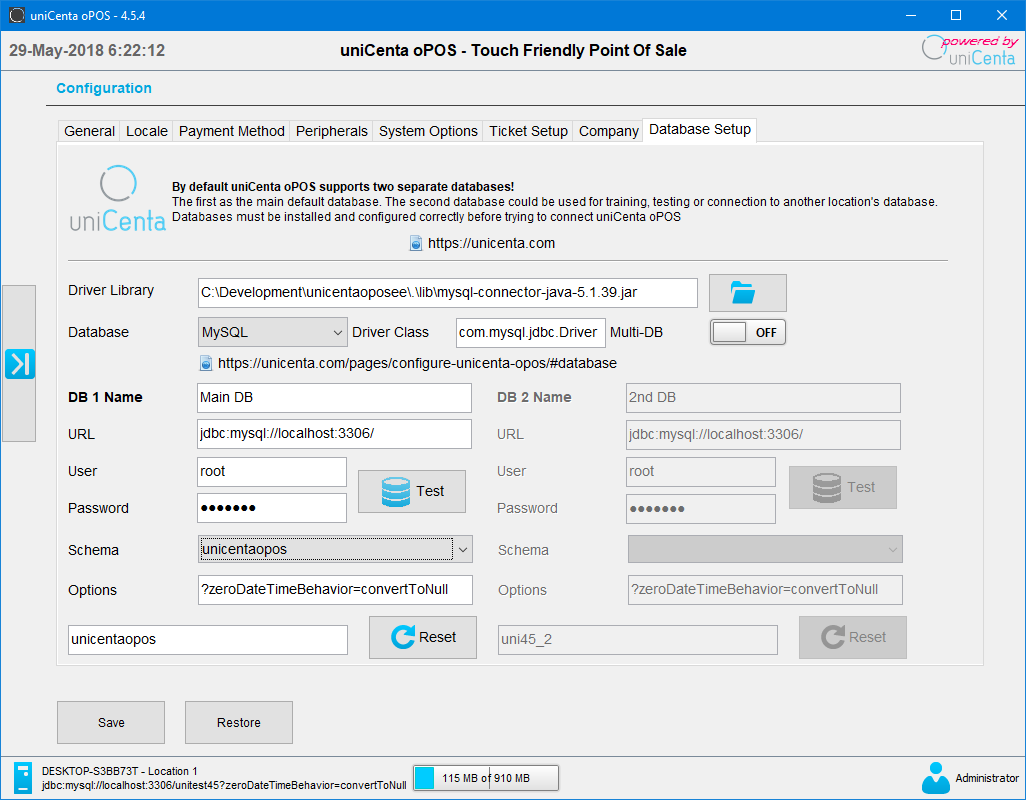 DATABASE SETUP
uniCenta oPOS v4 only uses MySQL. MySQL version 5.7 is recommended.
Driver Library : This is set by default on installation yet it can be changed as new MySQL drivers become available.
Database : Only MySQL 5.7 available in this version. Support for other SQL databases is planned.
Driver Class : This should not be changed.
Multi-DB : Slide to ON to allow connection to a second MySQL database.
SETTINGS FOR DB 1
DB Name : Any name you would like this database to be known by. DB 1 is should be your main “live” database.
DB URL : The fully qualified connection string to the MySQL database. If the MySQL server is on the same machine as the uniCenta oPOS installation it would look like something this – jdbc:mysql://localhost:3306/
User : The MySQL account user name.
Password : The MySQL account password for the User account.
Test button : Tests the connection to the specified MySQL server using the above settings and credentials. If successful it will populate the Schema dropdown list.
Schema : Select a schema from the list you wish to you use from that created earlier in the installation process.
Options : You can specify additional MySQL options here if you need them (please see MySQL reference documentation).
The default setting ?zeroDateTimeBehavior=convertToNull – is required and should only be changed if advised by your Database Administrator.
Reset : Use this button to clear any changes and resets the form to uniCenta oPOS defaults.
SETTINGS FOR DB 2
The option to have a second uniCenta oPOS database is useful for example if you want to try different settings , do training or access another department database all from the same machine.
The same procedure applies as in DB 1
Final thing you need to do is to Save your settings and restart uniCenta oPOS for them to take effect.
More help can be found in Customer Member forums
Screenshots may vary from actual screens used in the current uniCenta oPOS version